Home › Forums › Technical Information › Rudder Rigging
Tagged: control rigging, rudder
- This topic has 5 replies, 3 voices, and was last updated 8 years, 3 months ago by
Richard.
-
AuthorPosts
-
-
October 22, 2015 at 22:13 #2907
 Roscoe RoschéKeymaster
Of the three control surface systems in our planes the one that is most often not adjusted, or done wrong is the rudder. It is also the easiest to get to, it just has to be done by the book. In this case the book is the AA5 Series Maintenance Manual Dated July 15, 1978.
Let me quote from Chapter 27-2-1, page 501:
Rudder Rigging
A. Return Tension Adjustment (See Figure 501.)
(1) Remove tailcone per Chapter53.
(2) Remove trim per Chapter 25, as required to gain access to rudder turnbuckles.
(3) Hold rudder centered so that it aligns with top of vertical fin, and clamp phenolic blocks to rudder bellcrank as shown in Figure 501 so that rudder is held in alignment.
(4) Loosen rudder cable turnbuckles.
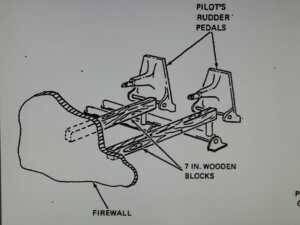
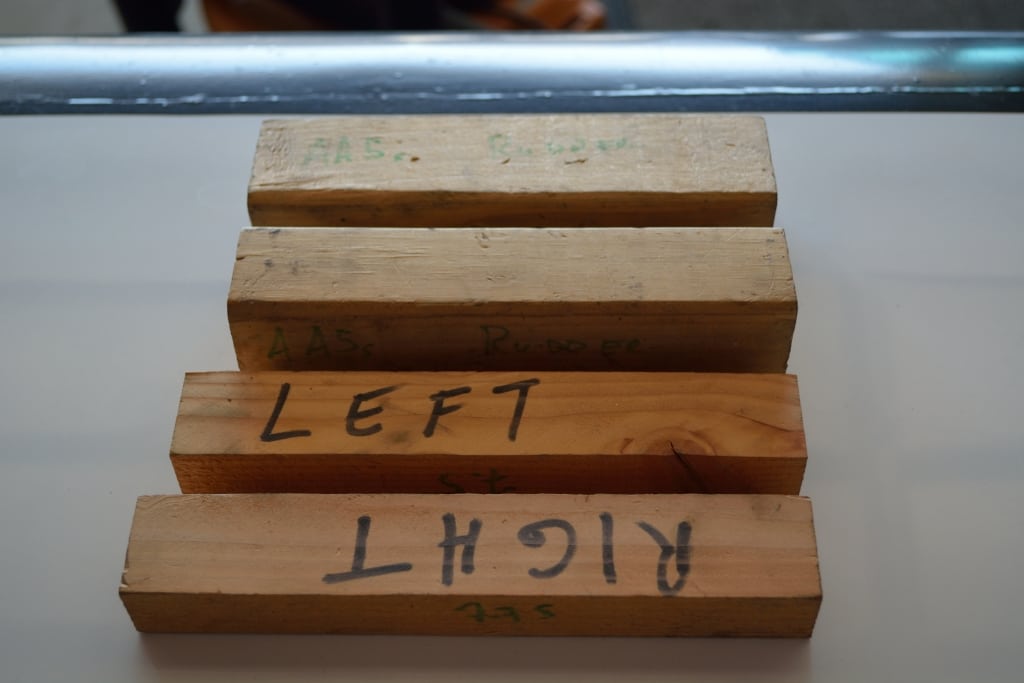
(5) Place a 7 inch wooden block between each pilot rudder pedal and the firewall, as shown in Figure 501.
(6) Slowly tighten rudder turnbuckles (each by same amount) until one or both wooden blocks fall from
behind rudder pedals.
(7) Safety rudder turnbuckles.
(8) Remove clamps and blocks from bellcrank.
(9) Install tailcone per Chapter 53So sayeth the book!
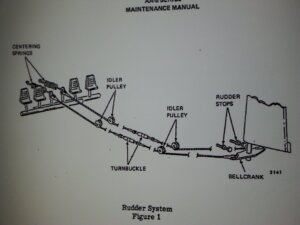
Here’s the big picture of the Rudder System in this diagram Figure 1, Page 2, Section 27-2-1.
Okay, tailcone is off (that was 8 screws and the light disconnected)
Trim removal, remove rear seat backs, put front seat full forward, flip rear seat lower up and forward, unsnap cover, and the world of rudder rigging is your!Here is Figure 501 from the book:
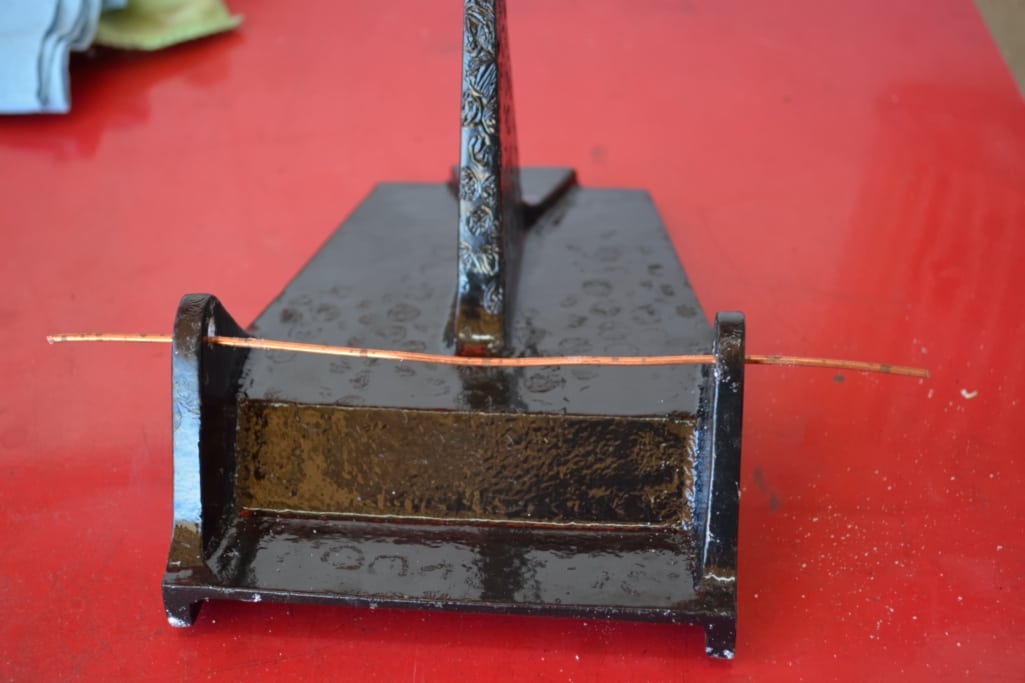
Here is the back of an actual rudder pedal, the copper wire is the hinge that you want the block of wood to touch. Getting the block of wood level so it will drop cleanly.

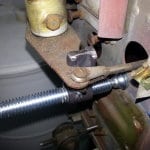
Clamp the rudder in the zero position as shown in these photos.
Tricky shot holding camera in one hand, rigging tool in other.
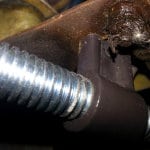
 Now in the exposed hell hole, remove the keeps (or safety wire) from the red (farthest right – facing aft) and the blue (farthest left – facing aft) turnbuckles. These control the rudder. Insert the coat hanger wire into the two holes at each end of the turnbuckles and loosen the center of both turnbuckles.
Now place a 7-inch (4-seaters) block of wood behind each of the pilots rudder petals putting the block against the padded firewall and the hinge bolt on the back of the rudder pedal. For the 2-seaters you use a 7.5 inch for the left block, and 7.75 for the right one.
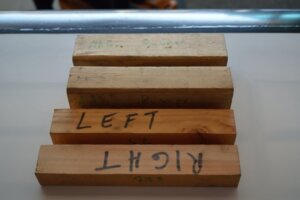 The AA5 series blocks are the top two, the bottom two are for the 2-seaters and are different sizes since the rudder there are deflected right 4 degrees.
Now slowing tighten the two turnbuckles each in turn in small increments until the wood block hits the floor. Safety the turnbuckles, remove the block and clamps, install the tailcone and you are done.
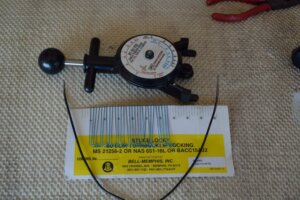 Here is the hangar wire to hold the turnbuckle ends, some new turnbuckle keeps, the dial instrument above is a cable tension meter.
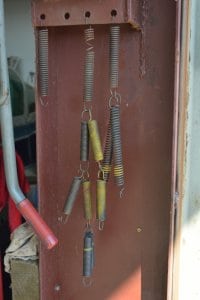
Here is a collection of various aged rudder springs taken out of pkanes over the years. The stretched ones get used on the hammock in Summer. While the turnbuckles are loose, that is the time to change rudder springs which are called out to be changed every 1000 hours. It is much easier to changed springs when the cable tension is loose.
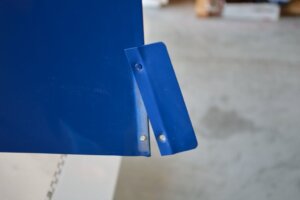
Now adjust the trim tab to neutral prior to flight testing the rigging. And as you can see here, frequently the rivets are a bit loose. This trim tab was held in with 2 rivets, now it is held with 4.
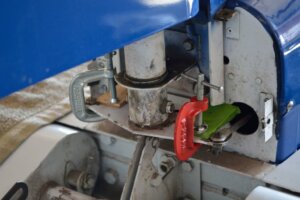
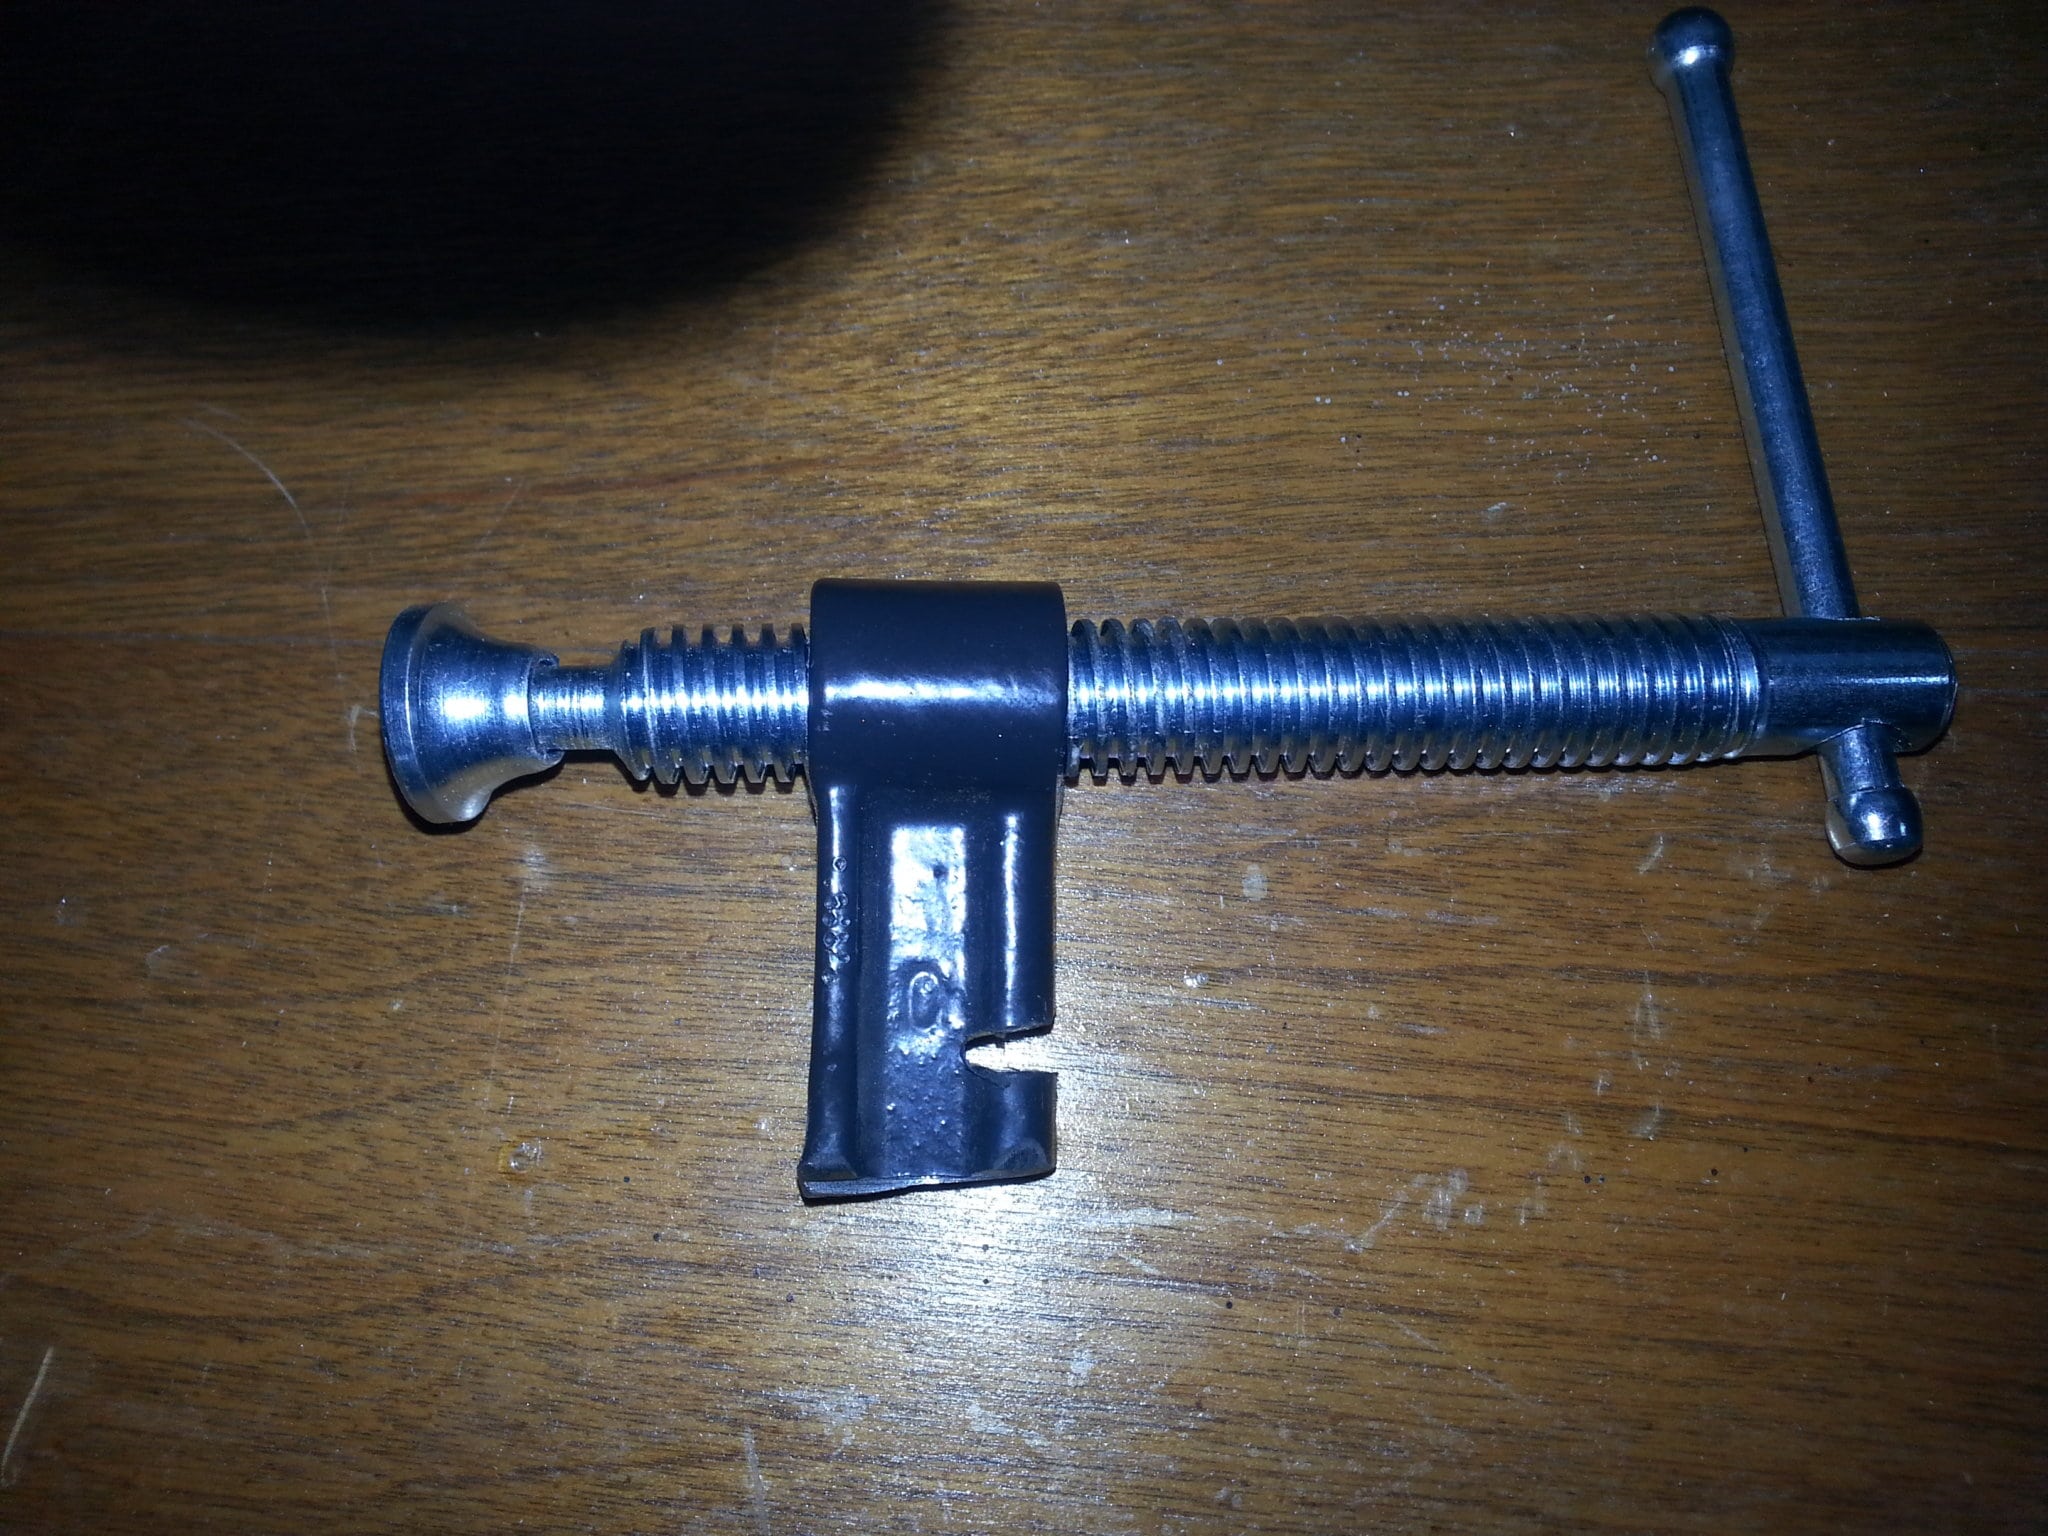
Here is the tool I made from a 3-inch Harbor Freight C-Clamp to help hold and adjust the rudder for the required reference on the rigging tool. The foot of the clamp can have felt, rubber, or tape on it, and the notch, goes into the horn to hold it in place. The advantage of the screws is that it allows the rudder to be held and adjusted in place. FYI
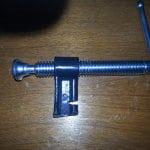
View from the top of the rudder horn. You cut the slot deep enough into the bar so that the tool does not rock much up or down and you can let it go. This is very helpful in a singe-man operation. You put the left tool in on the left side. Add a spring to put tension on the rudder to deflect it left (holding the tool against the bulkhead. They you can take the rigging fixture in your left hand and hold it in place and read it, while with your right hand you can move the rudder right with the screw. When you get it to the correct position (0 degrees for 4-seaters, Right 4 degrees for 2-seaters), you add the other tool on the right and now the rudder is locked for rigging.
View from the bottom of the rudder horn
-
November 8, 2015 at 19:44 #3025
 NathanParticipant
What are some symptoms that the rudder might be out of rig? Not returning to center after deflection?
-
November 8, 2015 at 21:10 #3036Roscoe RoschéKeymaster
No, slop in the rudder movement (felt as crispness in the action), or sits wrong all the time. I cannot remember if we did your at your prepurchase or not. Add it to your list for next year.
Roscoe
-
December 28, 2015 at 07:20 #3546
Richard
ParticipantHow long will it take to do the rudder rigging on an AA5B. Would like to come down on a Friday to have you do it.
-
December 28, 2015 at 22:46 #3550Roscoe RoschéKeymaster
Tailcone off to tailcone on, about 1.5 hours max.
-
-
AuthorPosts


- You must be logged in to reply to this topic.