Home › Forums › Maintenance of Grummans › Control Surfaces › Excessive Flap Movement
- This topic has 0 replies, 1 voice, and was last updated 9 years, 1 month ago by
 Roscoe Rosché.
-
AuthorPosts
-
-
March 7, 2015 at 23:08 #1342
 Roscoe RoschéKeymaster
The 4-seat airplanes in our line are getting to be 40 years old. About half of the ones that come into my shop have excessive play in one flap as compared to the other. It does not matter what position your flap is in, but move one flap as much as you can both ways. Then go and do the other flap the same way. You might need a ruler to truly measure it but excessive play will be easy to see. Most flaps move about 3/4 of an inch. The 79 Tiger today had a right flap move 3/4 of an inch and the left moved over 2 inches. It is usually the right flap, but today I did my first left one. This condition will cause the flaps to be asymmetric in flight and cause the plane to roll one way or the other. This can be offset with the trim tab, but the problem will only get worse and require the root cause to be addressed.
So you wiggled the flaps and one moved way more than the other. Open the hell hole under the rear seat and grab the primer green flap torque tube near one end and see if it moves. now do the other end near the honeycomb. Did they move or wiggle a bit. Probably. So now comes one of the most ‘fun‘ jobs you can do on a Grumman. I said fun instead of what will be a real ‘learnin’ experience to quote Ken Blackman.
This will be a two person job and it helps a lot if one had small hands.
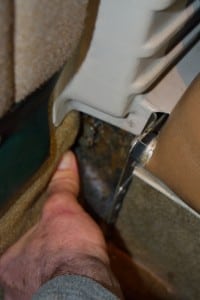
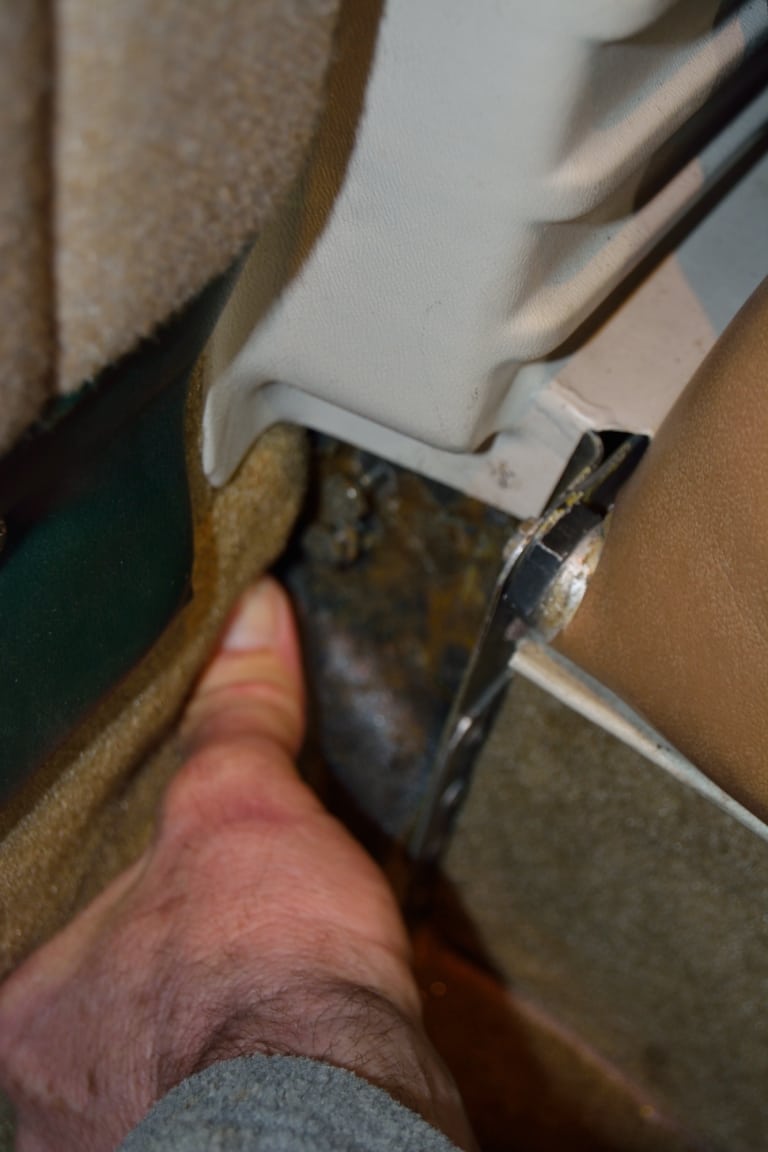
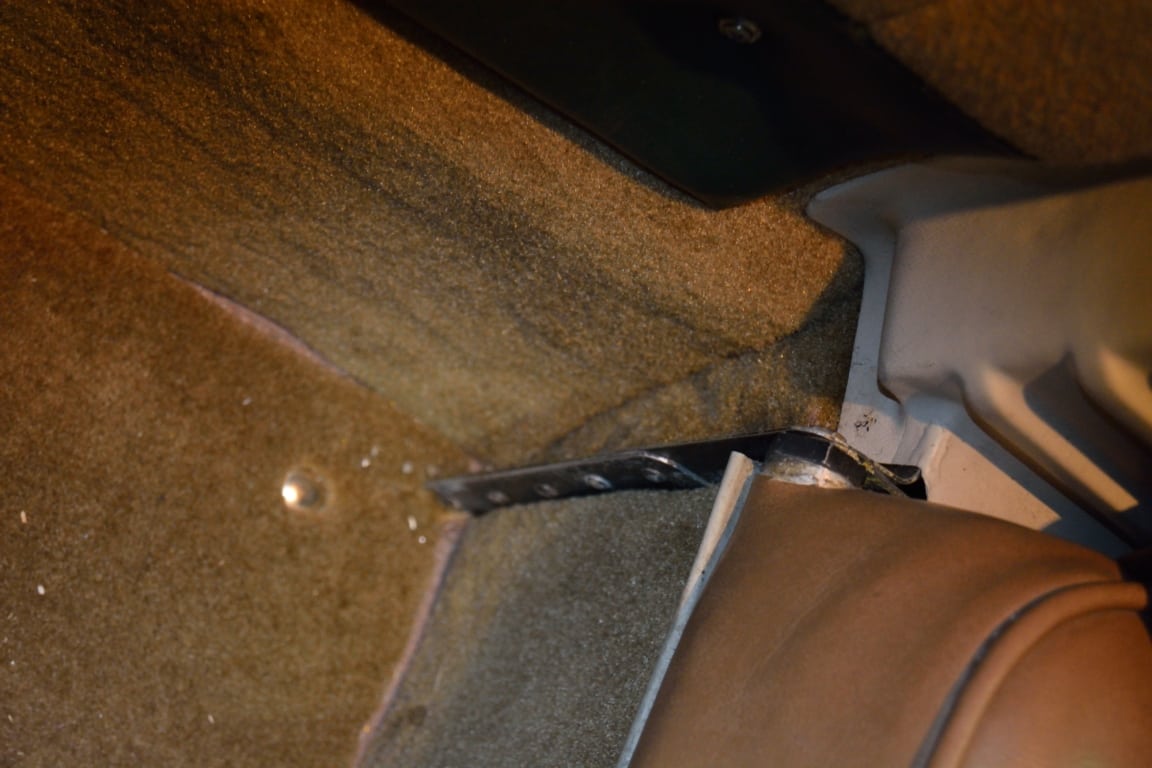
First remove the rear fuel line cover plates in the rear of the wing root (these have six holes in them). Then remove the clip plates so you do not cut your hands. If you look up into the hole you will see 2 AN3 bolts (one above the other) right above the flap torque tube where it enters the fuselage. These are the ones that you will get out and where small hands are needed to get at them over the fuel line.Moving inside the plane, peel back the carpet on the rear bulkhead aft of the rear passenger foot wells, the two pieces on the outside. See the attached picture of the carpet piece, and the after removal, the two AN3 bolts. Be very careful with these bolts as they go into spline nuts on the bracket and you do not want to hurt these. They are hard to get at and hold from the other side.
You will need some 3/8 inch wrenches for the nuts and bolts, and in the case of the 79 planes, a 5/16 socket for the lock nuts for the AN3 bolts coming in from the outside. In the case of a honeycomb bobbin falling out in the removal process, no worry, it will go back in easily.
Once these 8 bolts are out, you can now disconnect the flap motor actuator bar (remove the cotter pin and the AN4 bolt) and also remove the (2) AN4 bolts that hold the green flap torque tube to the eyelets that go to the flap ‘pork chop’ actuators.
Now that the torque tube is free you can wiggle it a bit at a time aft until you can get the brackets with the bushings out.
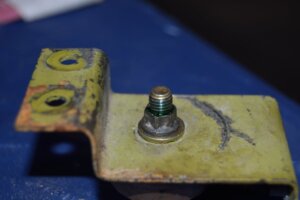
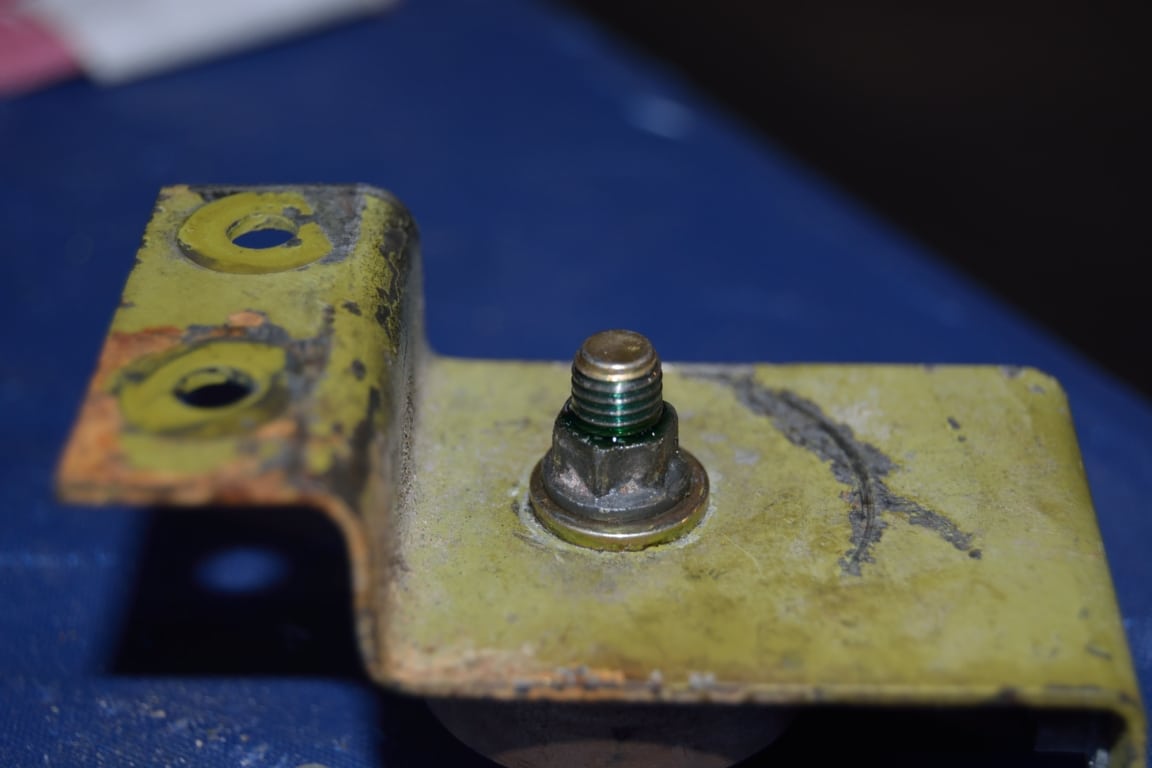
Once the bushings and brackets are out they can be cleaned and checked for wiggle. If you are very lucky they will just need new AN4-11A bolts and AN960-416 washers (you can reuse the lock nit) but add some Locktite 290 (green) to hold it for the future. IF not, the Ken at AirModsNW can sell you some oversize hole bushings and the steel bearing plate. If your bracket hole is too large, then you will need a new bracket as well. See the attached pictures.
If one of your bushings has a shim (a thin AN970 washer, shown in picture) be sure to put it back, it keeps the torque tube tight in the bushings, which now should not move. Movement in the bushing can be seen in the wear pattern shown on the bracket in the picture.
The final picture shows the drop of green Locktite on the nut.
Like all the books say, reassembly is the reverse of this process.

Attachments:
You must be logged in to view attached files.
-
-
AuthorPosts
- You must be logged in to reply to this topic.